If you’re looking for an exciting gaming experience, Palworld has it all. This open-world survival game blends farming, crafting, and hunting in a way that keeps you engaged for hours.
What makes it stand out, though, is the ability to capture a range of creatures called Pals—some cute and cuddly, others a bit more rugged. These Pals aren’t just for show; they help you build your base, navigate the world, and even fight off enemies.
With its mix of charm and competition, Palworld has quickly become a favorite among gamers, especially those who enjoy the benefits of dedicated servers.
Setting up your private server lets you connect and play with friends, customize game settings to fit your style, add fun mods, and enhance your gaming experience by reducing lag.
In this guide, I’ll walk you through how to create a dedicated server for Palworld using Hostinger’s virtual private server (VPS) hosting. Whether you prefer a hands-on approach or a simpler solution with our Game Panel, I’ve got you covered. Let’s get started!
Requirements Before You Create Your Own Palworld Dedicated Server
To get started with your Palworld server, the first thing you’ll need is a reliable game server hosting plan. Opting for a Virtual Private Server (VPS) is a great way to ensure you have a smooth and dependable gaming experience.
Providers like Scalacube, Shockbyte, and Hostinger are top choices, offering a variety of features designed to make your setup easier.
In this tutorial, I will use Hostinger’s Palworld VPS Plan, as it’s quite easy to set up.
When picking the best VPS plan for your Palworld server, keep these important system requirements in mind:
If you plan on hosting up to 32 players slot, I recommend going for 16 GB of RAM to keep everything running smoothly. In this case, Hostinger’s Game Panel 4 plan would be an excellent fit.
Get Hostinger’s Game Panel 4 Plan
✅16 GB RAM
✅ 4 vCPU cores
✅ 200 GB NVMe disk space
✅ Mod support
✅ Full root access
✅ DDoS protection
✅ Automatic off-site backups
BONUS OFFER: Use coupon “BLOGGINGRAPTOR” to get an extra 10% discount on the checkout page
How to Set Up a Palworld Dedicated Server Using Hostinger’s Game Panel Step-by-Step
If you’re not super comfortable with command lines and technical stuff, Hostinger makes it a breeze to set up your Palworld dedicated server with their Game Panel. This graphical user interface is perfect for those who are new to Linux and just want a straightforward way to get started.
Once you’ve chosen your hosting plan with Hostinger, the first step is to run through their initial VPS setup wizard. This is where you’ll set up a password, give your virtual private server a name, and select its location. It’s quick and user-friendly, so you don’t have to worry about getting lost in complicated settings.
After that, you can access your dashboard by clicking on the “Manage” button next to your plan. Here, you should see your server status showing as “Running.” If it isn’t running yet, just hit the start button to get it going.
With your server up and running, it’s time to dive in!
- Just head over to the VPS Overview menu and click the “Manage” panel button to continue the setup.
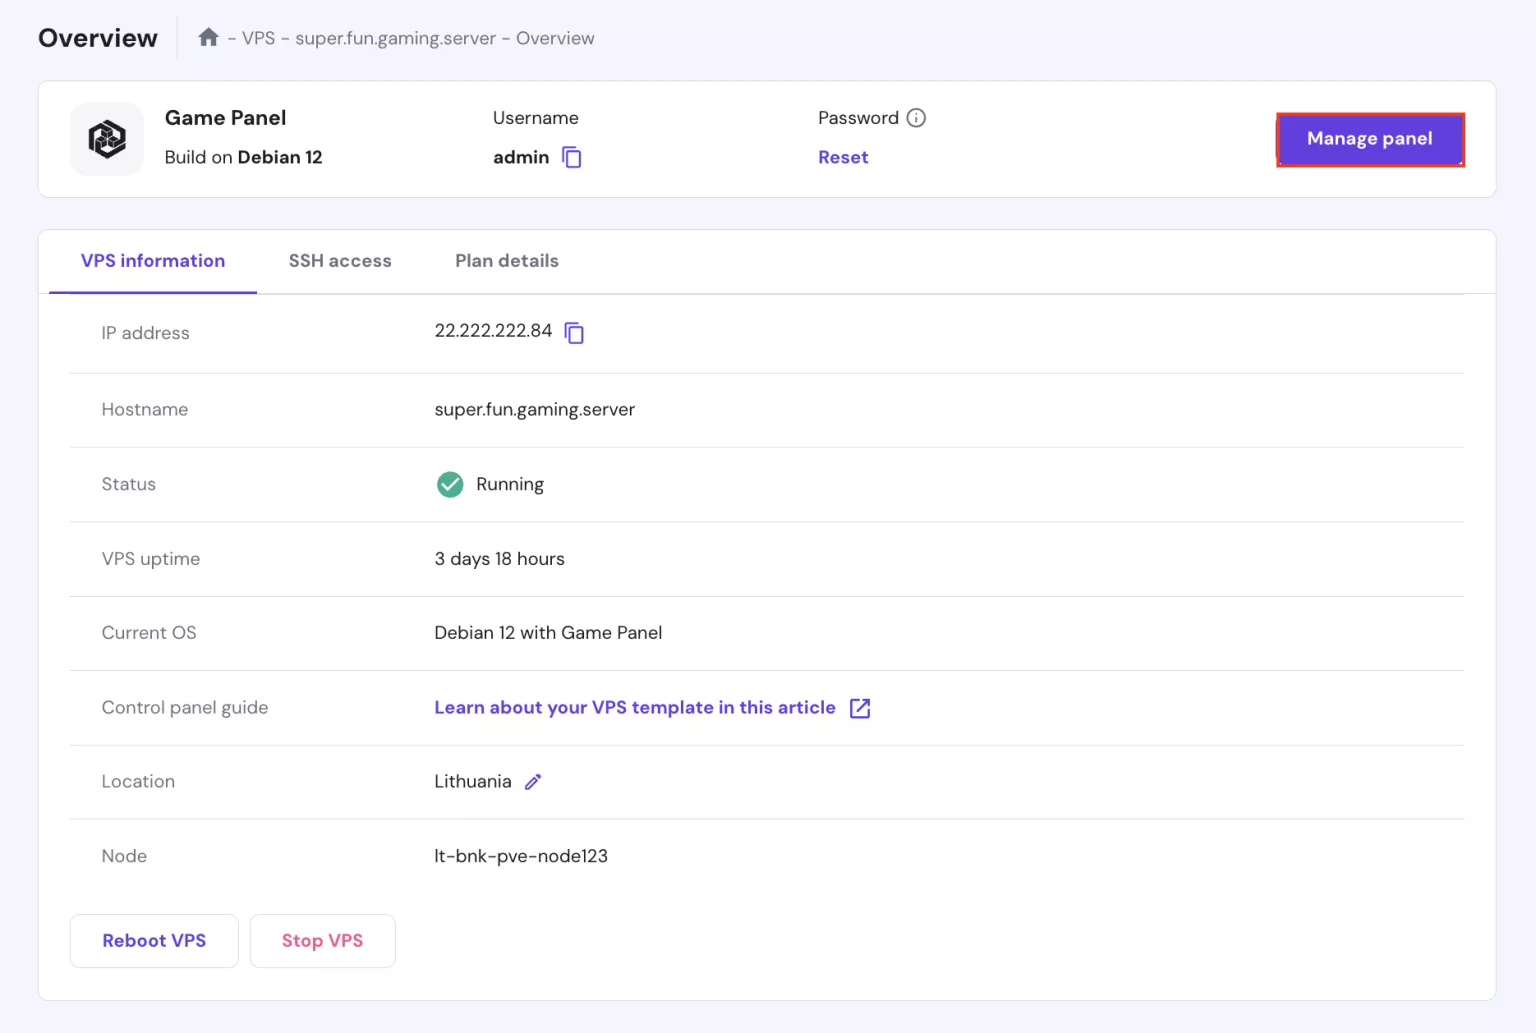
- To get started, head over to the login page and enter your admin panel username and password.
- Once you’re in, look for the “Create Instance” button. Click on it and select Palworld from the drop-down menu that appears.
- Hit “Create Instance” and wait until the creation process is complete
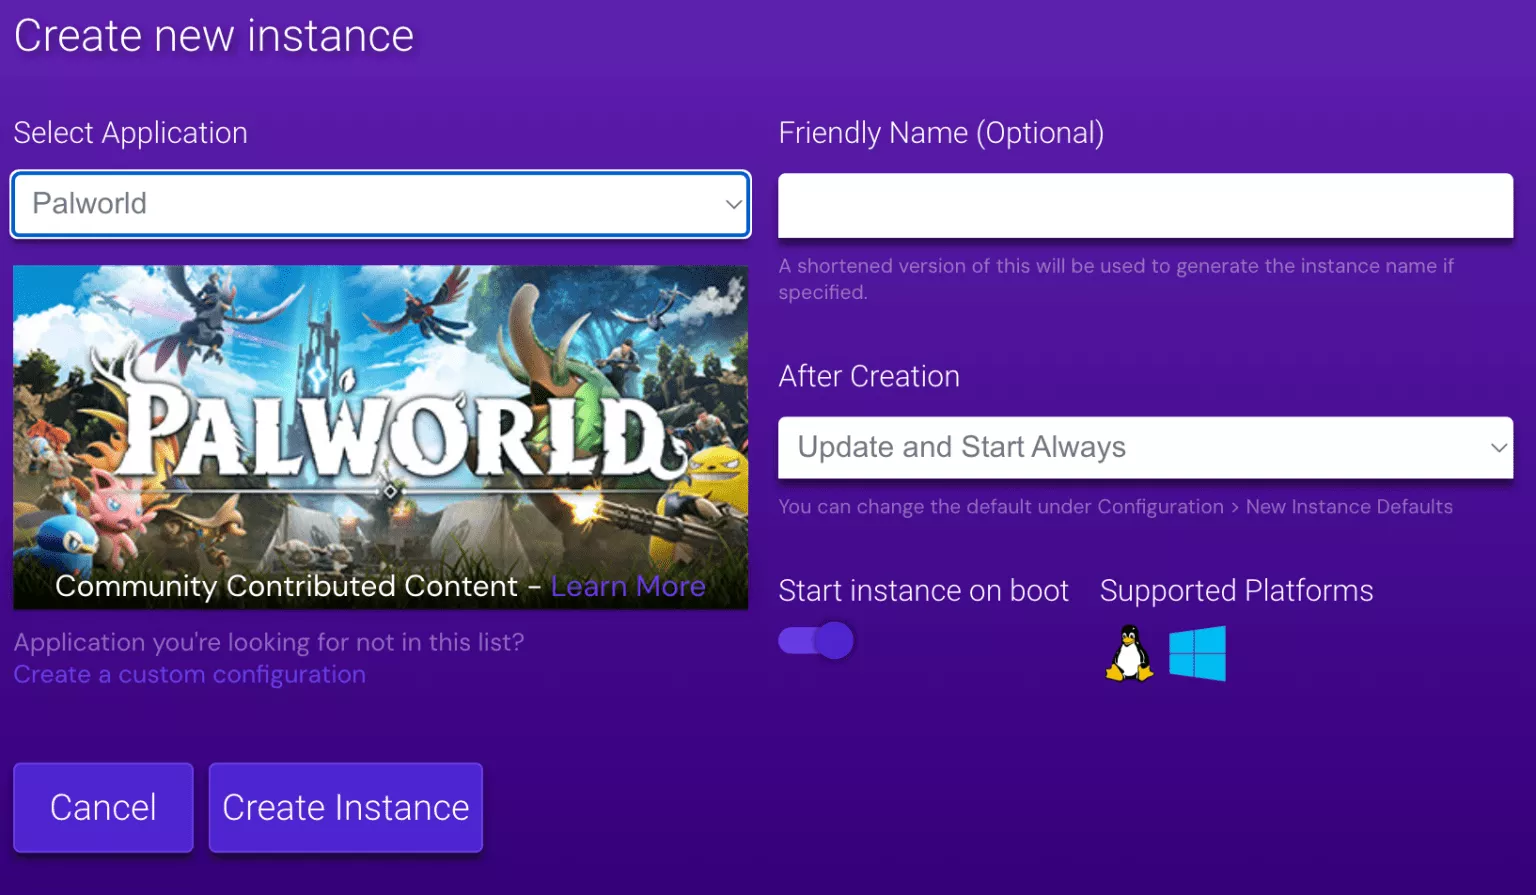
- And that’s all there is to it! To connect to your newly created server, simply launch Palworld and choose the Join Multiplayer Game option.
- Here, you’ll need to enter your VPS IP address along with the default port number, like this:
185.185.185.185:8211Once you’ve input that information, you’re all set to dive into the game and start playing with friends!
Look how easy it was to set up a dedicated Palworld server with Hostinger, now let’s see how you can do it manually.
How to Set Up a Palworld Dedicated Server Manually Step-by-Step
In this section, I’ll walk you through the process of setting up your very own dedicated server for the Palworld Steam version. We’ll cover everything from getting your VPS environment ready to add some fun mods that can enhance your gaming experience.
Just a heads-up: since we’re using Debian 12, some of the Linux commands may vary if you’re using a different distribution.
1. Set Up Your VPS
To get started with your VPS, you’ll want to connect using SSH. You can use tools like PuTTY on Windows, the Terminal app on macOS, or even Hostinger’s browser terminal. You’ll find the server’s IP address and your login details under the SSH access tab in the Overview menu.

When you log in for the first time, you’ll be using the root account by default. However, I recommend creating a new Linux account with superuser privileges. This helps to minimize the risk of accidentally running commands that could mess up your server. Here’s how to do it:
adduser accountJust replace yourusername with whatever you want to call your new account. Follow the prompts to set a password and complete the setup. Once you’re done, run these commands to give your new account superuser access and switch to it:
usermod -aG sudo accountsu accountNext, you’ll need to set up your VPS firewall to allow traffic through port 8211, which is essential for Palworld to communicate with your dedicated server. Here’s how to do that:
sudo ufw allow 8211/tcpsudo ufw allow 8211/udpIf you see an error about the command not being found, it could mean that the utility isn’t enabled or installed.
If you prefer a graphical interface, you can also set up your firewall rules through the hPanel. Just go to the VPS Overview, then Settings → Security → Firewall. From there, click Create Firewall Configuration, give it a name, and use the three-dot icon to edit the rules as needed.

Warning!
Enabling UFW might block the SSH port, which can disconnect you from the server. After installing the tool, immediately add a new rule to allow SSH or its port, which is 22 by default.
2. Installing SteamCMD and Its Dependencies
To get your dedicated server for Palworld up and running, you’ll need to install SteamCMD, which is a handy command-line tool for downloading and installing the necessary server files. Let’s break down the steps to make this process smooth and straightforward.
First things first, let’s update your APT repository. This step ensures that you have the latest package information. You can do this by entering the following command:
sudo apt update && sudo apt upgradeOnce that’s done, it’s time to download the dependencies required for SteamCMD. Start by installing the lib32gcc runtime library and the software-properties-common package:
sudo apt install -y lib32gcc-s1sudo apt install software-properties-commonNext, we need to add the multiverse repository, which contains additional packages. You’ll also want to enable support for 32-bit architecture with these commands:
sudo add-apt-repository multiversesudo dpkg --add-architecture i386After that, synchronize the APT repository one last time and install the SteamCMD package
sudo apt updatesudo apt install steamcmd -yNow that you have SteamCMD ready, it’s a good idea to install Linux Screen. This tool allows your server to keep running even after your SSH session ends, which is super useful. You can install it with the following command:
sudo apt install screenIf you’re looking for something a bit more versatile, consider using Tmux as an alternative terminal multiplexer. It offers more flexibility and user-friendly navigation, making it a great choice depending on your needs.
3. Downloading the Palworld Server Files
Now that we have everything set up, it’s time to download the Palworld dedicated server files using SteamCMD. This step is pretty straightforward and will get you one step closer to having your server up and running!
Start by entering this command in your terminal:
steamcmd +login anonymous +app_update 2394010 validate +quitThis command will log you in anonymously, check for the latest updates, and download the necessary files.
Once the download is complete, you’ll want to navigate to the newly created PalServer directory inside the Steam folder. You can do this with the following cd command:
cd ~/Steam/steamapps/common/PalServerIf you run into an error saying the path doesn’t exist, don’t worry! It’s possible that you didn’t run SteamCMD from your home directory. To find the correct PalServer folder path, use this command:
sudo find / -type d -name "PalServer"This command will search your entire system for the PalServer directory. Once you find it, you can navigate to that directory using the cd command again. For example, if you discover that your PalServer folder is in the steamapps directory, you would type:
cd /common/PalServer4. Starting Your Palworld Dedicated Server
Now that you’ve got everything set up, it’s time to launch your Palworld dedicated server! First, you need to head over to the PalServer directory and run the startup script. You can do this with the following command:
./PalServer.shOnce you execute this, the terminal will start displaying logs that show your server is up and running. However, you might run into an issue that looks like this:
.steam/sdk64/steamclient.so: cannot open shared object file: No such file or directoryIf that happens, don’t worry! Simply stop the process by pressing Ctrl + C, then follow these steps to fix the issue:
- Create the necessary directory:
mkdir -p ~/.steam/sdk64/- Log in to SteamCMD and update it:
steamcmd +login anonymous +app_update 1007 +quit- Copy the missing file:
cp ~/Steam/steamapps/common/Steamworks\ SDK\ Redist/linux64/steamclient.so ~/.steam/sdk64/After you’ve done that, try running the startup script again. If you still see a similar error message during the first boot, don’t panic! As long as you notice the line that says:
.steam/sdk64/steamclient.so OK. (First tried local 'steamclient.so')By default, if you disconnect from your SSH session, your Palworld server will shut down. To prevent this, you can use Linux Screen to keep the server running in the background.
First, navigate back to your home directory with:
cd ~Then start a new screen session by typing:
screenOnce you’re in the new session, go to the location of the PalServer.sh script and run it again:
cd ~/Steam/steamapps/common/PalServer./PalServer.shNow, to detach from the screen session and let your server continue running, just press Ctrl + A followed by D. If you ever need to reconnect to the session, simply use:
screen -r5. Configuring Your Palworld Server
Once you’re ready to kick off your Palworld dedicated server, you can customize it to better suit your needs. If you simply run the startup script without any additional commands, it will use the default settings.
But for those who want to tweak the server a bit, you can add specific commands to change how it behaves. Here’s a quick rundown of what you can do:
-port: Change the port that your server listens on.-players: Set the maximum number of players allowed on your server.-useperfthreads: Enable the performance system for tracking multi-threaded events.-NoAsyncLoadingThread: Disable asynchronous loading threads.-UseMultithreadForDS: Utilize your CPU’s multi-threading capabilities for better performance.-EpicApp=PalServer: Designate your VPS as a community server.
To adjust your in-game settings, you’ll need to edit the PalWorldSettings.ini file. Here’s how to navigate to the right folder:
cd ~/Steam/steamapps/common/PalServer/Pal/Saved/Config/Once you’re in the folder, you can open the settings file with a text editor like nano:
sudo nano PalWorldSettings.iniInitially, this file may be empty, but you can easily add parameters to customize your server. For instance, you might want to set the ServerName to choose what players will see when they look for servers, or you could set an AdminPassword for access to admin mode.
Instead of manually entering the settings, you can also copy the game’s configuration directly. To do this, go to your Steam library, right-click on Palworld, and select Browse local files. Look for the PalWorldSettings.ini file there.
Open it in Notepad, copy the settings you want, and then paste them into your server’s .ini file using Nano. Don’t forget to adjust the parameters and values according to your specific preferences.
After you’ve made your changes, remember to save the file in Nano. To do this, press Ctrl + X, then Y to confirm, and hit Enter.
6. Connecting to Your Server as an Administrator
Now that your dedicated server is up and running, it’s time to connect to it as an administrator. To do this, simply launch Palworld from your Steam library and select Join Multiplayer Game. Here, you’ll need to enter your VPS’s public IP address along with the default port number. For example, it might look something like this:
185.185.185.185:8211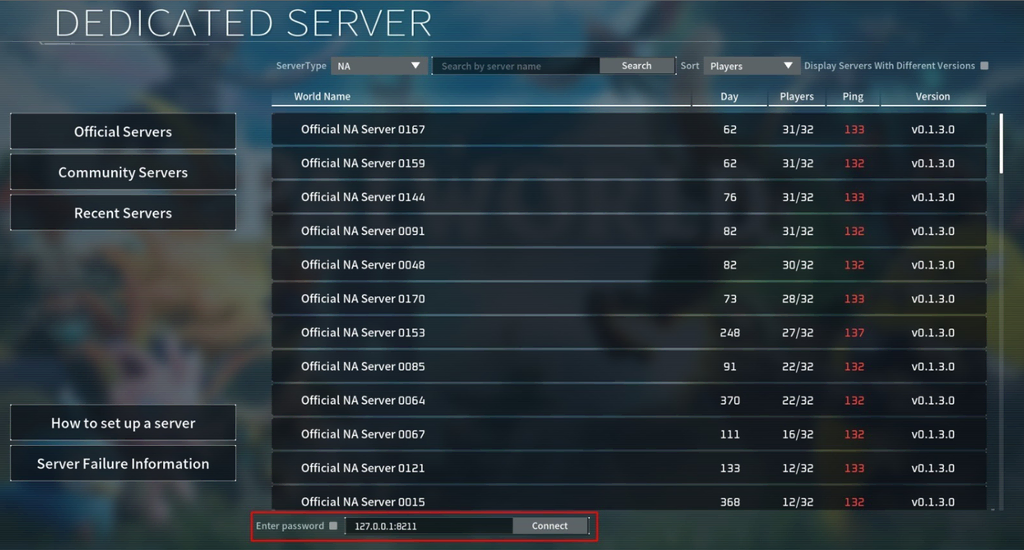
Once you’re in, other players can join your server using the same IP address. If you’ve set up your server using the EpicApp argument, they can also find it through the Community Servers menu.
After you’ve joined the game, hit Enter to open up the chat feature. This is where you’ll enter your admin commands. To gain admin privileges, type the following command:
/AdminPassword yourpasswordMake sure to replace yourpassword with the actual admin password you’ve set. If everything is in order, you should receive confirmation that you’re now an administrator. If not, double-check that you’ve added the AdminPassword setting in the PalWorldSettings.ini file.
As an admin, you have the power to manage player behavior, which is essential for maintaining a fun gaming environment. If you need to kick or ban someone for disrupting the experience, you can use these commands in the chat:
- To ban a player:
/BanPlayer playerID- To kick a player:
/KickPlayer player IDYou can find players’ IDs by using the /ShowPlayer command. If you’ve banned someone and want to review the list of banned users, navigate to the /Pal/Saved/SaveGames directory and open banlist.txt it with nano. If you decide to unban a player, just remove their ID from this file.
7. Managing and Maintaining Your Palworld Server
To keep your Palworld dedicated server running smoothly, it’s important to monitor its performance regularly. This helps ensure everything is stable and secure. A handy tool you can use is the htop command, which you can access through SSH.
It gives you a clear view of how much CPU and memory each process is using, helping you spot any potential issues early on.
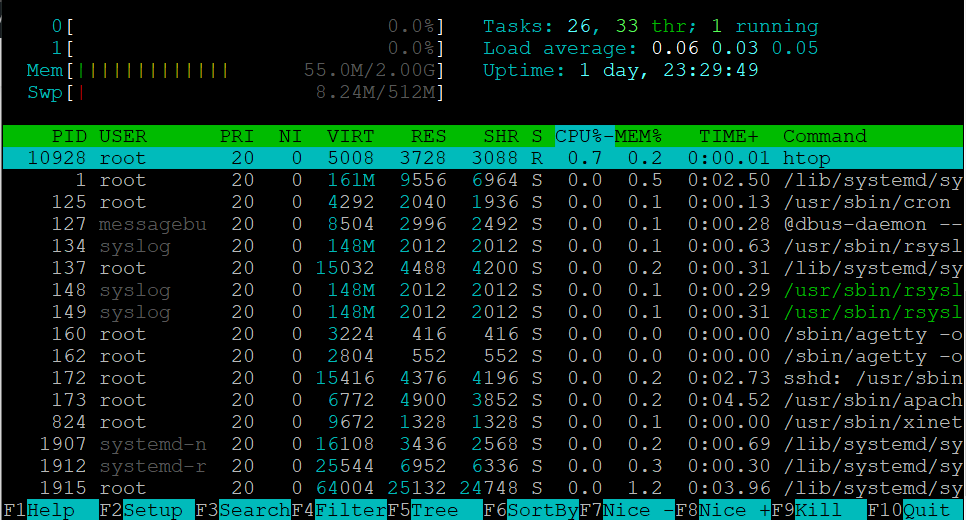
By checking this information, you might find that you need to adjust things to optimize your server. For example, reducing the number of player slots can help lower RAM usage, which can prevent lag or even crashes when your server gets overloaded.
Another key aspect of server maintenance is keeping your software up to date. Regular updates not only enhance performance but also help protect against security vulnerabilities. You can easily do this by running:
sudo apt update && sudo apt upgradeIf you’re using a web hosting service like Hostinger, they offer some built-in features that can make managing your Palworld server a lot easier. For instance, they provide snapshot capabilities and regular backups to ensure your data is safe.
Additionally, Hostinger includes a monitoring tool in their hPanel, which lets you track your Linux server’s performance right from your web browser.
This can be incredibly helpful for those who prefer a more visual way to manage their server. They also have event logging and a malware scanner to make security audits simpler.
8. Enhancing Your Palworld Server
Using a Palworld dedicated server offers not only greater control and stability but also the ability to enhance your gaming experience with custom mods.
Many players love adding mods to make the game more visually stunning or to tweak the gameplay mechanics, such as speeding up travel or adjusting how quickly stamina runs out.
You can easily find and download mods from popular sites like NexusMod or CurseForge. Depending on the type of mod you want to install, the process may differ.
For example, mods that come as PAK files can simply be extracted into the Pal/Content/Paks folder and the game will automatically load them when it starts.
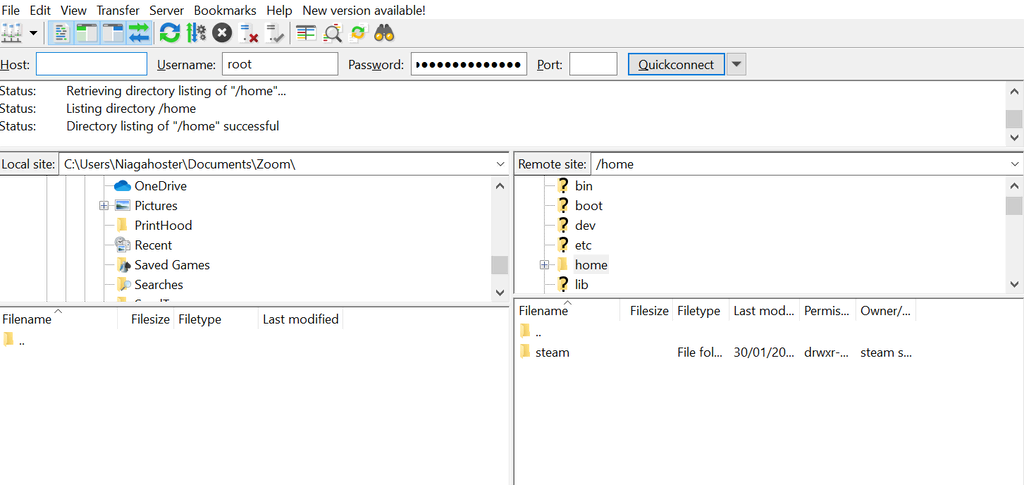
For more complex mods, like those based on scripts, you’ll need to use UE4SS (Unreal Engine 4 Scripting Support). However, since UE4SS isn’t natively compatible with Linux servers, running script-based mods on a Linux Palworld server requires setting up a modded version of the server using Wine, which acts as a compatibility layer to run Windows programs on Linux.
By customizing your server with mods, you can make Palworld uniquely suited to your preferences, creating a more tailored gaming experience for you and your friends.
Hostinger Palworld Server Plans and Pricing
Final Words
If you’re looking for a more personalized Palworld experience with greater control, setting up a private server is the way to go. The public servers Palworld provides are great for joining in with others, but they come with limitations.
You can’t manage users or install mods to enhance gameplay the way you might want to.
For full control, I recommend setting up your server using a VPS hosting plan. A good option is using something like Hostinger’s Game Panel, which simplifies the entire process.
The Game Panel comes with an easy-to-use interface, allowing you to select Palworld from a list and adjust in-game settings without much hassle. All you have to do is create a new instance, pick the game, and tweak the settings as needed.
If you prefer a more hands-on approach, you can set things up manually. This involves installing SteamCMD, downloading the necessary Palworld server files via SSH, and then running the server with a Linux Screen.
Once you’ve got that done, you can customize your server further by editing the .ini file to suit your gameplay preferences. This gives you the flexibility to control your server’s behavior, from player limits to advanced mods.
Get Hostinger’s Game Panel 4 Plan
✅16 GB RAM
✅ 4 vCPU cores
✅ 200 GB NVMe disk space
✅ Mod support
✅ Full root access
✅ DDoS protection
✅ Automatic off-site backups
BONUS OFFER: Use coupon “BLOGGINGRAPTOR” to get an extra 10% discount on the checkout page
Either way, whether through an interface or manual setup, hosting your own Palworld server ensures a customized multiplayer experience.

